


Intro
Amelia WP is one of the best booking systems for WordPress, it serves not only as a front end calendar, but also as a full blown web app with frontend/backend management for the developer, business, and end user!
While Amelia WP is my GO-TO booking system to use with clients, it DOES have many drawbacks, in this article I am going to help solve one of those drawbacks! Group Discounts.
Prerequisites
Amelia WP (Paid)
WordPress
WooCommerce (Free)
Auto Coupons for WooCommerce (Free)
Overview
For Amelia WP to have group discounts, we NEED WooCommerce as there is not native support for calculable discounts.
WooCommerce is a powerful eCommerce plugin for WordPress, if you have not heard of it yet I recommend you do some of your own research and return (Eventually I will write up an article on it)!
What we will be doing is setting up WooCommerce to handle payments, set each service that needs discounts to have a custom WooCommerce product, and setup the free Auto Coupon plugin to apply the discount when needed!
Steps
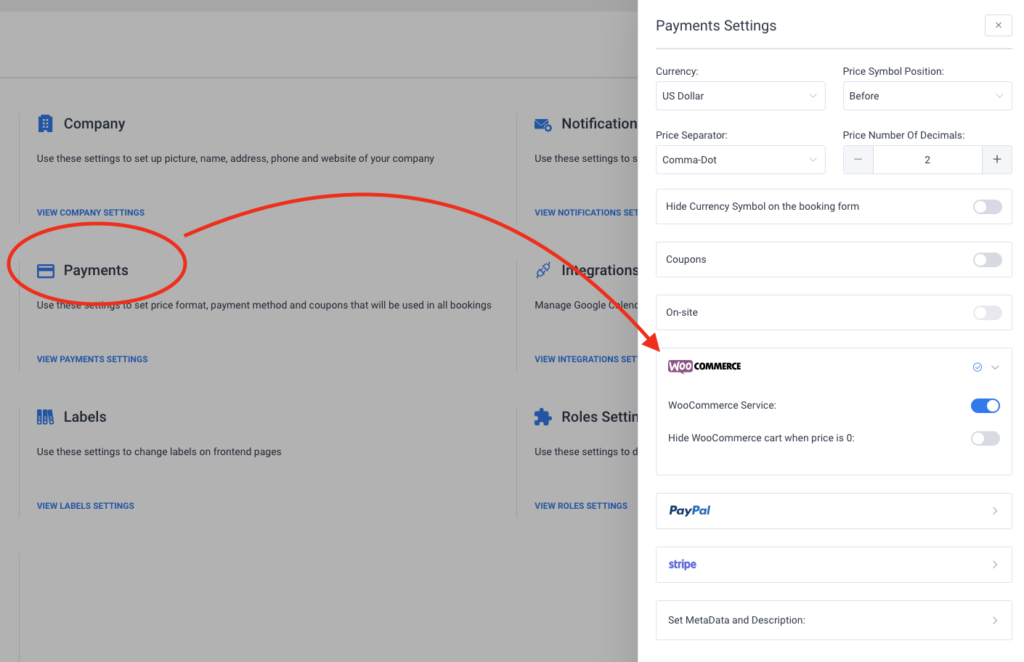
Step 1) Make sure WooCommerce is installed, activated, and set up.
Step 2) Make sure Amelia and all services / events are set to use WooCommerce.
Step 3) Create a custom WooCommerce Product.
The best way to do this is to clone the existing “Appointment” product and rename it. (amelia requires products to be set up in a specific way to be usable, otherwise you’ll get a “product not available” error after the end-user is directed away from Amelia and into WooCommerce)
To make this easier on yourself, I suggest naming the product based on the needed discount.

Step 4) Set the event/service to use the new product instead of the default “Appointment” product.
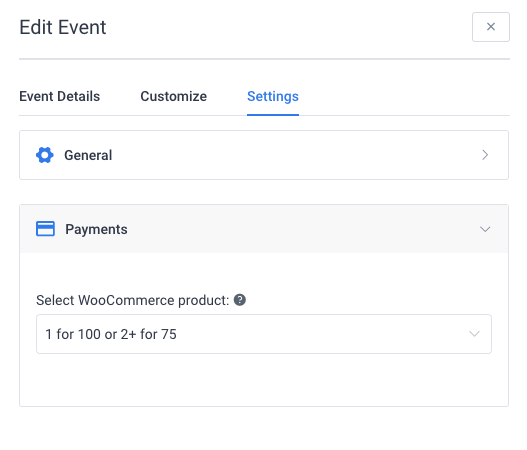
Step 5 Overview) For this example my client has a $100 class per person, or $75 per person IF booked together.
For this to work we will be using the free “Auto Coupons for WooCommerce” plugin to automatically add a coupon to a specific product.
This may be the complicated part if you are not good at math.
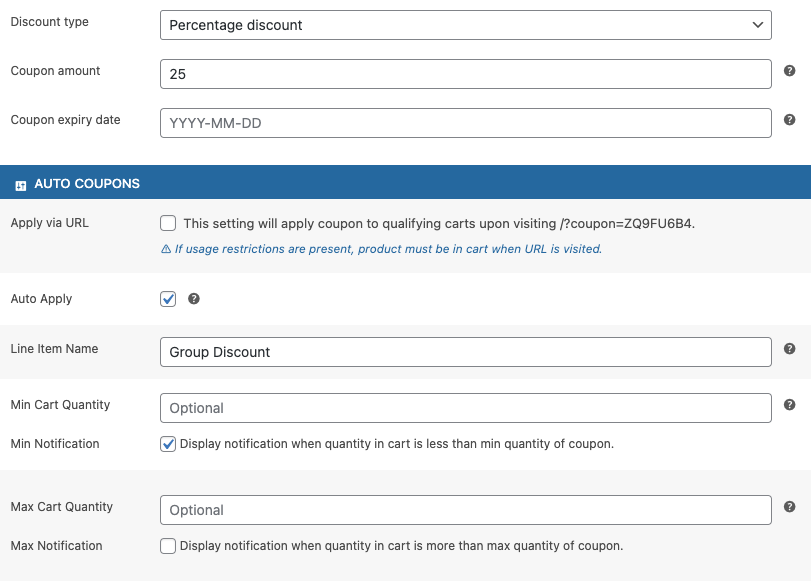
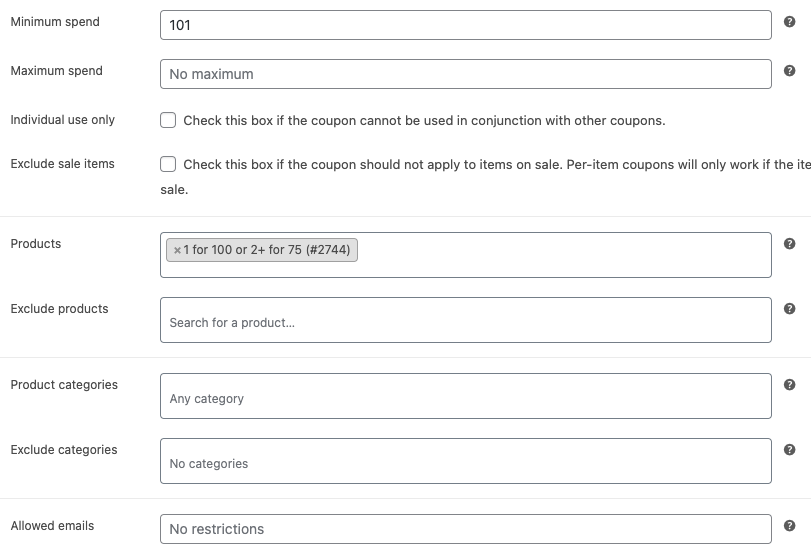
I created a 25% off coupon that requires a minimum purchase of $101.
So if the cart total is $100, the coupon would not work, but if the total was $101, it would, so if the end-user tries to buy two tickets, the price is $200 with 25% off, making it now $150!
Step 5) Create a coupon (Marketing -> Coupons).
The coupon name can be anything, but keep in mind you can’t have the same name twice, as the name is an inputable code. So “Group Discount” can NOT be used twice… (Unless if you add a few blank unicode characters at the end)
Set the description to match how it works. Ex: “1 for 100 or 2+ for 75”
Leave the Expire date blank if you do not want it to expire.
Once you’ve done the math to achieve your needed group price, input the fixed or % discount.
If you have properly installed Auto Coupons for WooCommerce you should see an “Auto Apply” option, make sure that is ticked!
Now, click Usage Restrictions on the left side so that we can make sure it only works on the service/event the discount is for, under Products, type in the name of the product we created in Step 3.
Final Thoughts
That should be it!
We created a coupon that sets auto-applies once a minimum price is met, and we make sure that it only applies to the needed events/services by restricting it to the custom product, that we also created and set!
If you have not used WooCommerce before, make sure you have actually set up payments with WooCommerce otherwise the user will not be able to checkout.
While I am not a fan of WooCommerce, it a very powerful tool that let’s us get the needed functionality with Amelia WP!
If you got value out of this tutorial please consider subscribing to my newsletter to get notifications on new articles, or please consider donating via my Buy me a Coffee widget!

0 Comments